Notice: Function register_sidebar was called incorrectly. No id was set in the arguments array for the "Sidebar 1" sidebar. Defaulting to "sidebar-1". Manually set the id to "sidebar-1" to silence this notice and keep existing sidebar content. Please see Debugging in WordPress for more information. (This message was added in version 4.2.0.) in /var/web/site/public_html/wp-includes/functions.php on line 6121 Golden Tee Fan zCOURSES Archives - Page 27 of 108 - Golden Tee Fan

Archives for the ‘zCOURSES’ Category

Crawdad Swamp — Hole #15: Par 4

By Deprecated: Function the_author_posts_link was called with an argument that is deprecated since version 2.1.0 with no alternative available. in /var/web/site/public_html/wp-includes/functions.php on line 6121 • Category: Crawdad Swamp • • Leave a Comment (0)

The easier tee box is further from the green on the right side. If you’re on the left side of this box, use a high tee and wrap it around the right side of the trees into the green.

From the right side of this box, it might just be straight over with a high 6W at the green.

By far, the tougher box is front-left, which can be anything from a 9H to an 8.5 driver. From the left 2/3 of the box, consider cutting a low-teed 0H through the trees…find a gap and try to hop through the bunker if needed onto the green. Just remember that there is a stream of water short! This 0H was cut down perfectly through the trees to find a back pin. This 1-bird clips the tree but amazingly rolls up out of the sand into the cup!

You can also cut down an 8.5 driver and clip a tree on purpose, but those trees also have branches that can knock it down. From the left box, here’s an incredible low-teed driver that catches the tree to slow it just enough on its way to the cup!

If you’re all the way at the back-left, you can turn left two times and play a high 8W at the green through a gap.

If there’s a left wind, you can turn right and play a high 8W C3 shot to green.

From the front-third of the box, you can still play a 0H through the trees, but you can also play high-lofted, high-teed hybrids such as the 7H or 9H by turning right and playing a C3 shot into the green.




Crawdad Swamp — Hole #16: Par 3

By • Category: Crawdad Swamp • • Leave a Comment (0)


Crawdad Swamp — Hole #17: Par 4

By • Category: Crawdad Swamp • • Leave a Comment (0)


This can be a terribly difficult eagle with a lot of setups. If the distance sets up right, an 8W could be the play. With a headwind, a high 8W over the trees is a good play. With a tailwind, if the distance is okay, use a standard 8W with backspin. It’s good to try to use the 8W if you can just because the loft is so handy. From the back-center, here’s a great medium-teed 8W with backspin that finds the hole. If you play a 9W, that can be great here too — here’s an ace from the left of the box.  Here’s another medium-teed 9W cut around/over the tree with backspin into the hole.

For other distances, you can apply the same concepts with a 5H or 7H. For example, with a tailwind from the left part of the box, a 7H with backspin is a good play. With a headwind, this high-teed 6W was a great play to find the cup.

Don’t forget about trying to use the fairway to bounce down if you don’t have the loft to clear the trees. Something like a spinny 2I curled around could be an example of that, as well as the 5H.


Crawdad Swamp — Hole #18: Par 4

By • Category: Crawdad Swamp • • Leave a Comment (0)

There is a fairly-forgiving hill on the right you can use to settle onto green most of time, making this not the worst closing hole. Still, setups with a strong left wind are quite challenging and might have you rotate left once to play an A2-type shot to cut into the wind at the green.

From the right box with a nice right wind, this 3-wood with bite settles into a back pin.

With a strong headwind, this driver powers through to a back cup.


Pine Meadow — Golden Tee 2019

By • Category: Pine Meadow • • Leave a Comment (0)

Enjoy this remastered course from Lynnwood, Virginia!

Here’s the recommended club set from GTF, while the recommended balls are Streaks, especially to give you more chance at eagle on #1.  Grabbers are good too and offer more control in holding the green with tailwinds on certain holes.


Pine Meadow — Hole #1: Par 4

By • Category: Pine Meadow • • Leave a Comment (0)

This hole is sometimes drivable, especially if you’re a big hitter playing Streaks.  But even with other balls, you can often get close to the green for a chip at eagle.

Check out this huge C3 that finds the hole off the tee!  Here’s another big drive straight at it with the Streaks.


Pine Meadow — Hole #2: Par 4

By • Category: Pine Meadow • • Leave a Comment (0)

Here you’ll be tucked slightly behind a tree, so it’s useful to use a tee to slide left.  You’ll need a bit more club to make sure you carry the hill in front of the green, but assuming you do that, it’s a flat putt for eagle.

Here’s a driver curled around the left side that bounces up onto the green and into the hole!


Pine Meadow — Hole #3: Par 3

By • Category: Pine Meadow • • Leave a Comment (0)

This is one of the tougher par 3s you’ll find anywhere in the first three holes.  The left trees are in play, and there’s a good amount of wind and green slope to tackle.  Add in a high-lofted club and this will test your shot-shaping skills!

From the front box, here’s a nice 8-iron dunk.  And here’s a 9-hybrid punched over the top to that same left pin.

From the back box, this 5-hybrid settles into the cup.


Pine Meadow — Hole #4: Par 4

By • Category: Pine Meadow • • Leave a Comment (0)

Nothing much to think about off the tee here unless you have a preferred distance for your approach, which is slightly uphill into a large green.


Pine Meadow — Hole #5: Par 4

By • Category: Pine Meadow • • Leave a Comment (0)

This is usually a 3W or driver and whether or not you use a tee depends on the wind…the two-tiered green of course makes this tricky, especially if you need to carry to the top tier.  Here’s a nice driver with bite that hops up to a pin on the upper tier.

From the left of the box, here’s a 3W with backspin to a left pin on the lower tier.


Pine Meadow — Hole #6: Par 4

By • Category: Pine Meadow • • Leave a Comment (0)

A high tee is fine even with a cross-wind here even though it’s a down-6 green.  I like to try to line up as straight as I can with the green and just play a small hook.  Here’s a high-teed 3W that hugs the left side for the dunk.

You might opt to play it out right more with a tailwind if you need backspin to hold the green, as you won’t be flying directly over the trees.  Here’s a driver with bite cut around the right side that finds the hole!


Pine Meadow — Hole #7: Par 5

By • Category: Pine Meadow • • Leave a Comment (0)

It takes a while to comfortably nail the distance off the tee here, which is almost always a C3-type shot with a wood.  You can’t be short because of the water but you can’t be long because the fairway falls off and you’ll have to lay up.  Practice finding the right club and tee height with the conditions and use backspin to hold your curve in the fairway.  From the fairway, this 5-wood spins back to a front pin.


Pine Meadow — Hole #8: Par 3

By • Category: Pine Meadow • • Leave a Comment (0)

You’ll see many different looks on this short hole but they are all pretty manageable, even if you have a gap in your club distances…just tee it high or low to account for that.  Stay safe towards the center of the green if needed for your birdie putt.  From the front box, here’s a nice SW with bite punched over to a right pin.  And this one spins back to a front-left pin.


Pine Meadow — Hole #9: Par 4

By • Category: Pine Meadow • • Leave a Comment (0)

Even with tough winds, you’re always able to work a high-teed wood onto the green here…just picture your shot around the left of the rocky hill to start and then stay to the right of the trees by the green.

From the front-left of the box, here’s a high-teed 5W over the top to a left pin.  And here’s a driver that stays low through the gap to find the hole.


Pine Meadow — Hole #10: Par 4

By • Category: Pine Meadow • • Leave a Comment (0)

You may sometimes catch a ramp on this hole to propel your ball up towards the green — this one settled in the front sand.  And this one just kept going all the way up to the green…an amazing low-teed driver with roll!  But otherwise it’s just a fairway layup anywhere for a lofted approach into the green.

Here’s a hole-out from the end of the fairway.


Pine Meadow — Hole #11: Par 5

By • Category: Pine Meadow • • Leave a Comment (0)

I haven’t found a reason yet to play the left side of the fairway.  Always do what you can to blast as far as possible down the right side, preferably a ways away from the hill which will be blocking your approach.  That gives you more room to curve a wood around the hill into the green if needed.  With a clear approach from the right fairway, here’s a backspin hole-out with the 4-wood.  This drive didn’t quite get far enough but a well-curved recovery finds the hole.


Pine Meadow — Hole #12: Par 4

By • Category: Pine Meadow • • Leave a Comment (0)

This is a really tough shot into a narrow green, where missing either right or left will result in water.  You usually just have to take your medicine and shape a shot as best you can to counteract the slope and wind and settle anywhere on the green for a putt.  This driver with bite finds a center pin.


Pine Meadow — Hole #13: Par 3

By • Category: Pine Meadow • • Leave a Comment (0)

This shot is easier with the pin on the lower tier, since you can use the tier as a backstop if needed while coming into the green.  Here’s an 8-wood that deflects nicely off the tiered wall settling back in the cup.



Pine Meadow — Hole #14: Par 5

By • Category: Pine Meadow • • Leave a Comment (0)

In rare scenarios, certain gifted players may take the risk to try to drive this green! Check out this example where a lot went right for it to hop on up, but still amazing!

There are two layup spots here off the tee depending on the wind. If possible, it’s better to fly it straight ahead all the way to the far fairway, which offers a clear approach into the green.

The other layup spot is in the center fairway, where there is a gap in the trees allowing a fairly straight approach through them depending on the wind and where you end up. You’ll be in the front half of that fairway area, and slightly right of center is ideal. Too far right causes your ball to slope downwards and you’re closer to the trees, making the approach more difficult to curve.


Pine Meadow — Hole #15: Par 4

By • Category: Pine Meadow • • Leave a Comment (0)

With a tailwind, you’ll club down and hammer a wood with backspin which has enough elevation to clear the hill through the trees on its way to the green.  With a headwind, use a high tee and play the same line right at the green.  Cross-winds likely call for a high tee as well to ensure enough loft.

From the back of the box, here’s a nice high-teed 3W that carries down through the gap in the trees onto the green and into the hole!


Pine Meadow — Hole #16: Par 5

By • Category: Pine Meadow • • Leave a Comment (0)

The play off the tee is just to blast out straight ahead…distance is important to ensure an open approach at the green.  Then you’ll just be battling the slope of the green on your approach trying to be close enough for a manageable putt.  After a drive out in the left fairway, this 6-wood settles in a cup on the back-left of the green.


Pine Meadow — Hole #17: Par 3

By • Category: Pine Meadow • • Leave a Comment (0)

For having a flat green, this is often a terribly difficult par 3. The shape of the green is awkward and small with water everywhere, but the kicker is the elevated approach with a hill guarding the front.  That takes some lower-lofted iron approaches out of play and forces you to loft into pins in the front.  Cross-winds are just devastating and make it a really tough birdie.  Here’s a 5-hybrid with a tiny cut to a back-center pin.  With that same look, this 9-wood also finds the hole by cutting into the wind.


Pine Meadow — Hole #18: Par 4

By • Category: Pine Meadow • • Leave a Comment (0)

There are lots of different curve shots you’ll play here…usually anywhere from a 9W to a 3W.  It can be tough to stick the green depending on the wind, and it’s really tough to gauge the impact of the wind as well.  Many players come up short trying to figure it out, so you should try to bail out long with a miss.  Also be careful with backspin which really sucks back due to the green slope.

From the front of the box with a strong wind towards the hole, this 9-wood with bite finds the cup!  And here’s a high 8W with a small cut around the trees that finds the hole.


Pembroke Links — Golden Tee 2019

By • Category: Pembroke Links • • Leave a Comment (0)

Here are some early screenshots of the course!  Here is the official preview of the new 2019 Lamphey, South Wales course.

Across the Atlantic Ocean, golf returns to its roots—to its rugged, long and spectacular origins. Here in Lamphey, South Wales, Pembroke Links provides bold travelers with an opportunity of a lifetime. Ancient ruins can be seen off in the distance; some will even be in play. The Celtic Sea, with the tide methodically coming in and out, creates a rhythm that seems perfect for this style of golf. And then, of course, there is Pembroke’s trademark feature: the bunkers. They are immaculately crafted and reach depths no Golden Tee creation has ever reached before. It would be best to marvel them from a distance rather than from within. This much is certain.

Here is a 6-hole preview and discussion from the Golden Tee lounge!

GT Par is most commonly -27 to -28 here, depending on whether or not #8 is drivable.

This post contains tips, tricks, and information related to the 2019 Golden Tee course Pembroke Links! Check out the hole-by-hole breakdowns and example hole-outs as I partner up with the Golden Tee community to give you the edge you need to beat your friends!

The GTF club set of choice is below, with the preferred ball being Streaks for advanced players and Grabbers or Razors for casual players:

Check out this podcast (itunes) (anchor) which breaks down each hole on Pembroke Links offering advice to improve your game, but also know that I have listened and accounted for this advice in my hole write-ups already!


Pembroke Links — Hole #1: Par 4

By • Category: Pembroke Links • • Leave a Comment (0)

Some players in rare setups might blast one close to the green for a chip at it, but usually you can line up with the wind anywhere, fairway or not (rough to the right is fine), for your approach.

After laying up in the fairway, here’s a nice 3-wood hole-out to a back pin.

One new tee box here is way back left where you just lay up in the main fairway.


Pembroke Links — Hole #2: Par 4/5

By • Category: Pembroke Links • • Leave a Comment (0)

Often times you can use a high tee and hit a big A1 or C3 into the second fairway, over the creek.  After blasting down to the second fairway, here’s a 6-wood hole-out for double eagle.

Another great layup spot, though, is the fairway island to the left before the water.  It’s big enough that landing it with a driver or 3-wood with bite should not be a problem.  From there, you’ll have another 3-wood or so into the green with an uphill shot.

There’s a new tee box way up left that turns this into a drivable par 4…you’ll have to carry a long wood up into the green and stick it for an eagle putt.


Pembroke Links — Hole #3: Par 3

By • Category: Pembroke Links • • Leave a Comment (0)

There are two large tee boxes here that can offer many different looks.  From the front box, here’s an ace to a center pin.  And here’s a 5-hybrid to a back pin.

From the back box, this driver finds a back pin.

There’s a new tee box behind the water to the left from about 290 yards as well.


Pembroke Links — Hole #4: Par 4

By • Category: Pembroke Links • • Leave a Comment (0)

An offset look with a downhill shot into an hourglass green all contribute to the challenge here, but the green is large enough that you should be able to stick a safe spot.  Three tee boxes offer many different looks.  Don’t chase a sucker pin in a narrow part of the green that could lead to early trouble!

From the left box, this 3-wood does indeed find a center cup.

One new tee box is front-center of the left two boxes from about 260 yards…here’s a 5-wood backspin ace from there.

There’s a new tee box to the left of the back-center box from about 320 yards as well with a tough offset look at the green.


Pembroke Links — Hole #5: Par 5

By • Category: Pembroke Links • • Leave a Comment (1)

Almost always here, I like to play a big driver straight ahead to the right fairway…you only need to get a little ways past the hill to have a clear approach into the green.  This also keeps you close in line with the elevation to the green.

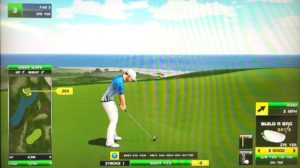
After a really long drive down the right side, here’s a 6-iron hole-out.

There is a ramp here; it likely won’t do you much good but in theory at the right angle it could propel your ball towards the green…however, with Razors or Grabbers and an out wind you could break your long drive record here.  Check out this one that traveled 542 yards!

Playing out to the left is also a fine option, especially if the wind sets up better from that direction — here’s a 3W hole-out with bite from there.

The new tee box here in the back-right doesn’t impact your strategy off the tee.  Nor, I think, does the new box in the front-center.


Pembroke Links — Hole #6: Par 4

By • Category: Pembroke Links • • Leave a Comment (0)

Downhill shot to an up 6 green with another offset look…bite can be a good play with a front pin where you play towards the fat middle part of the green.  Here’s a driver ace to a front pin.
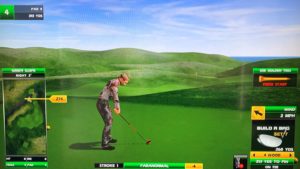
One new tee box is to the right from about 300 yards.

There’s a new tee box here up to the right from about 250 yards as well.